How to setup your own dedicated server?
Requirements:
- A new gameranger account(also possible with your normal account but then you will be devoted to host a server all the time)
- BF2142 Unranked Server files(latest 1.51) -> Download link (link updated 19/03/2015)
- Firewall must allow the server and gameranger ports.
Step 1:
Install the BF2142 unranked server and follow the readme at the end of the installation if you wanna go more deeper into it.
Most people will allow the ports of BF2142 and Gameranger so I won't spend much time clearing that out.
Link to the server files: http://planetbattlefield.gamespy.com/fullstory.php?id=164413
Step 2:
Make a new gameranger account if you want to. I advise this because you can't run the server and play at the same time with one account.
Make a new gameranger account if you want to. I advise this because you can't run the server and play at the same time with one account.
Step 3:
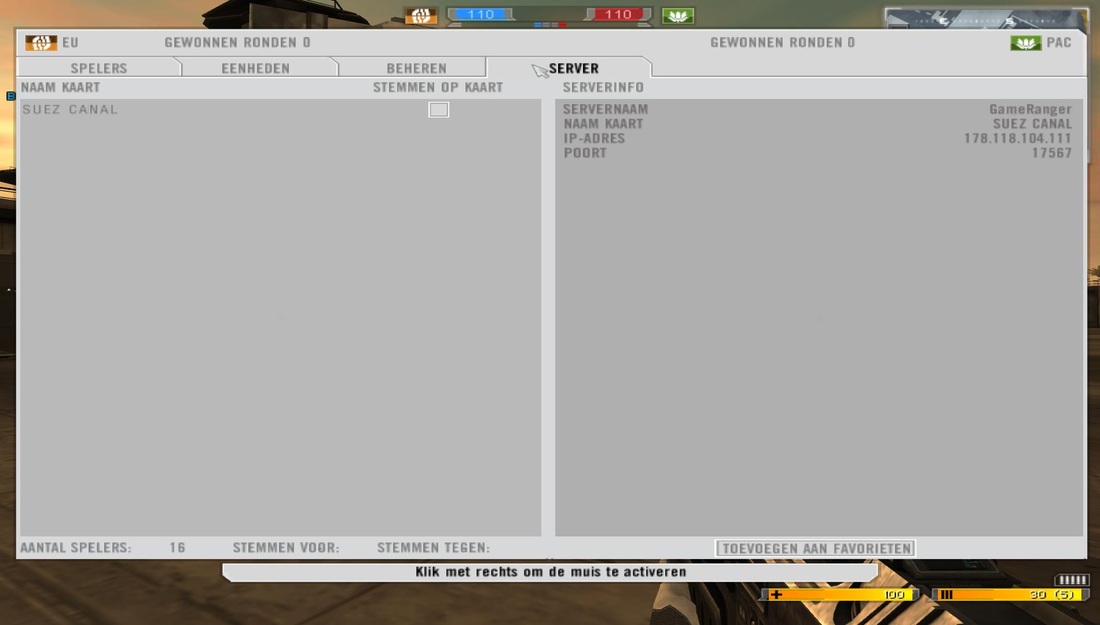
Then make a lobby in gameranger as host and create a local BF2142 game to see what IP you use for the server you can see it ingame or while you are loading the game. Write this down.
Most of the times it will be your home public adress but just to check if thats correct you should try this out.
Screenshots where you can see this below.
Step 4:
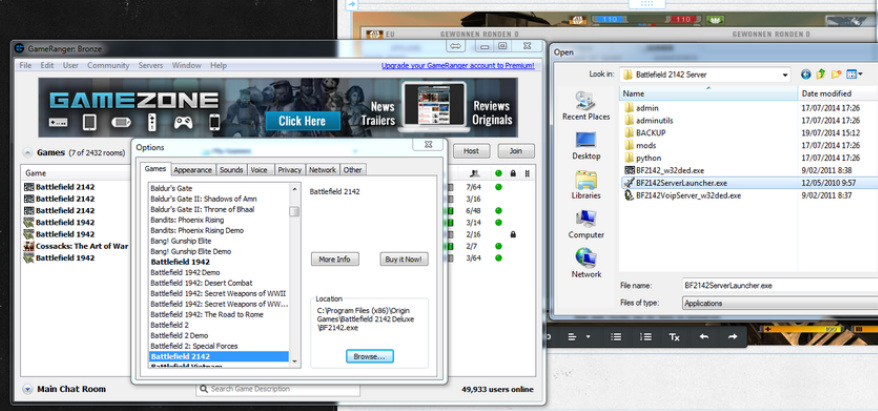
Now you have to go to edit->options->games and browse to the BF2142 server folder there you select the BF2142ServerLauncher.exe to set it up the easiest and most user friendly way(you can also do it by selecting the other .exe file but it has manual settings). Then press ok. It should look a bit like this.(down below)
Now you have to go to edit->options->games and browse to the BF2142 server folder there you select the BF2142ServerLauncher.exe to set it up the easiest and most user friendly way(you can also do it by selecting the other .exe file but it has manual settings). Then press ok. It should look a bit like this.(down below)
Step 5:
Now lets try if it starts if it doesn't work you can start all over again look what you did wrong or then you have firewall problems.
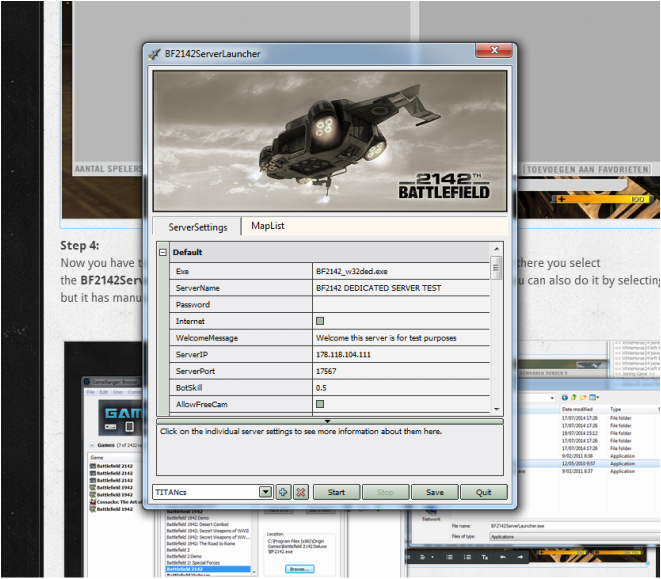
If it works the battlefield 2142 server launcher will appear in front of you with the many settings and numbers. Don't worry you can almost start editing them. First you will need to create a new server profile. To do so, click the '+' sign in the mid bottom of the server launcher application (If it's your first time launching a server, it will say default on the left of the plus) Enter a new server profile name. You should now be able to edit the fields. You will now need your written down ip now. You will see a box where you can choose ServerIP. There you put the written down ip in my case the one on the picture before as you see.
Now lets try if it starts if it doesn't work you can start all over again look what you did wrong or then you have firewall problems.
If it works the battlefield 2142 server launcher will appear in front of you with the many settings and numbers. Don't worry you can almost start editing them. First you will need to create a new server profile. To do so, click the '+' sign in the mid bottom of the server launcher application (If it's your first time launching a server, it will say default on the left of the plus) Enter a new server profile name. You should now be able to edit the fields. You will now need your written down ip now. You will see a box where you can choose ServerIP. There you put the written down ip in my case the one on the picture before as you see.
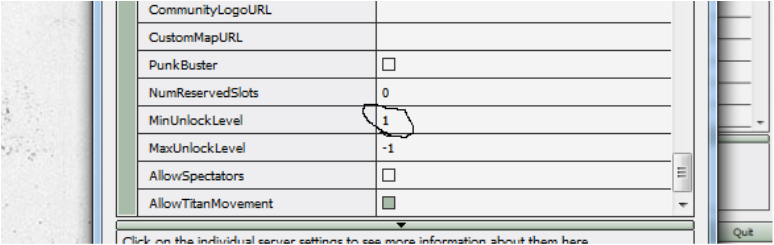
TIER 1 UNLOCKS:
If you want tier 1 unlocks (the first 2 unlocks from each kit) then make this option the same as stated in the picture. So turn it up to 1.
That is basicly it and the server doesn't allow more when using this configuration tool.
Don't forget to tick the "Internet" option on. (the one you can see in the picture above)
Let the fun begin:
Now go on and configure your server and hit the start button don't forget to save your progress!
If you still don't know what to do after reading this you can always contact us on this website.
More coming soon hopefully!
Now go on and configure your server and hit the start button don't forget to save your progress!
If you still don't know what to do after reading this you can always contact us on this website.
More coming soon hopefully!
